Saturday, 11 January 2014

XR650R Baja 1x Dream Bike Build (The Motor)

The 1x XR650R had many different configurations tried by Bob Bell and Honda and it is almost impossible to know exactly what the 2005 Baja 1000 winning bike had going on inside the motor. 

From my research I have ascertained that some amount of porting and polishing was done on the internals of the head, they fitted the HRC kit pictured below, minus the high compression piston (apparently to reduce power slightly as they were struggling with traction). There were air intake mods like the HRC airbox cover mod and something called a 'Bat Wing' which was an aluminium scoop inside the air box to smooth air flow into the carb. They also had the CDI tweaked to increase the rev limiter and produce better characteristics for desert racing.

Bad news is the motor is one area that I didn't modify internally from my already modified but sad looking XRR motor:


There are a few reasons for this. Firstly I can't find an HRC kit, they were discontinued years ago, secondly my motor already has a Stage 1 Hotcams and Vortex programmable CDI fitted and I feel that it already has the punch to make this bike a scream to ride and it was done not long ago. 

I will however be adding a Pro Circuit reverse megaphone race exhaust system and the Bat Wing mod to make it closer to the original 1x bike. If I come across an HRC kit one day, I will jump on it and do the motor justice by fitting it, but for now I am being realistic and moving on.


Now, the other aspect of the motor is how it looks. As you can see my poor old XR had a tired looking motor and it needed some freshening up. I started by removing it


I blanked everything off and used a solution of aluminium cleaner and water to scrub the casings all over. After many hours it came up looking as fresh as a new one! As with the rest of the bike I also removed visible bolts one at a time and polished them with my Dremel . I also got new clutch and stator covers which makes a big difference visually!

And here is the finished product:


And here is a Precision Concepts motor (not the 1x but similar):


I will write about the air intake/batwing mods in a subsequent post for anyone interested!

XR650R Baja 1x Dream Bike Build (Rear Suspension)

The rear shock used on the original bike was a Precision Concepts hybrid of a CR500 upper and XR650R lower. Two way postage to PC in the states would have made it a very expensive choice for the build so I picked a local suspension shop that has experience building these hybrid combinations for the big XR and gave them a specific brief to not only get it as close to being the real thing, but also looking like the real thing 

The hybrid shock ready to fit

So the red anodized bit is the 'high-speed' adjuster on the CR500 part of the shock. 
'high speed adjuster'

The benefits of the hybrid shock are:
  • larger shock body with more oil, better for cooling and less fade when hot
  • High speed adjuster for desert racing
  • Slightly longer stroke, meaning a raised rear end to the bike

The original had a titanium red spring, which I could not find so David at Suspension Matters found the correct non-titanium spring for my weight and got it powder-coated that Ferrari red to match the race bike. The internals of the original are largely unknown as Bob Bell and his team kept the internal mods on the low down. I am sure Adv inmate BUMP will know more as he has had a lot of contact with the Precision Concept guys over the years the XRR was raced. I however had to choose the best parts available to me, so I went with a revalve and a race tech Gold Valve along with a total overhaul of the seals on the CR500 body.

New bump stop and red spring
Fitted to the bike with 'Bob Bell' sticker

I hope you will agree that it looks like the real thing and David over at Suspension Matters did an awesome job given my crazy requests!

XR650R Baja 1x Dream Bike Build (Update 2)

Wow time has flown!  Apologies for anyone following the build via this blog, but I have somewhat neglected my duties, although I have been keeping people up to date over on my Advrider build thread.

New house, means new shed, means loads of space, means lots of progress over the last year (but still not enough in my mind!).  The bike is showing serious signs of completion now and I will attempt to add a whole lot of information at once. Moving forward I will make a new post for each component to keep it easy to read, with regular 'update' posts to show overall progress.

Please use the menu on the side of this blog to jump straight to the topic you are interested in as I add them.

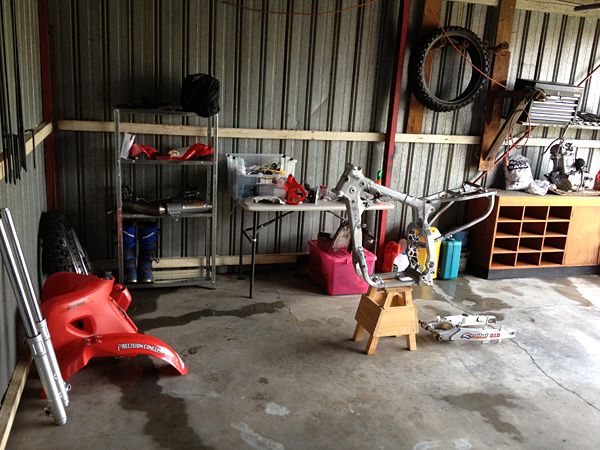
Since I last wrote I have put a lot of time and effort into finding sources for parts and it has been amazingly successful.  I will touch on this a little later though.  Just three months ago my shed looked like this:


And after many hours watching Ebay and the internet for parts this is what the bike now looks like (well actually this was a few weeks ago but I want to take you through the stages):
Shows the custom rear shock fitted
The motor is cleaned and back in with exhaust fitted
over all things are looking nice and new again

So I ended up having a serious run of luck after inadvertently meeting the father of Mike Childress who was one of the three riders to ride the exact bike I am replicating to victory in the 2005 baja 1000.  It also turned out that since then Mikey had the front suspension (by Precision Concepts), fuel tank (IMS) and the works race exhaust system (T4 by Pro Circuit) off the actual bike sitting in his Dad's garage and they were looking to offload it!  So amazingly, along with a front brake rotor I got from a BITD bike ridden by Johnny Campbell, I now have many major parts that have a strong link to the real bike.  I am not sure what one calls a replica that has real parts on it but I do know that It makes the build that much more important to me and any followers.

I got the rear shock sent away and rebuilt into the CR500/XR650R hybrid which Precision Concepts did on the original, even copying the red rear spring.  I can't wait to try that out with the original fork combination!  I will post more on this soon.  I have also had a large OEM Honda order arrive which includes tonnes of new plastics and other bits to freshen up my rather tired XRR.  I must say that even I am impressed with the way it looks after fantasising for all this time over photos of the real thing.

The most recent major addition has been the Fluidyne radiators which arrived this week.  They were used ones so I have cleaned them up and fitted them.  More to come on this later too.  The major parts still needed are triple clamps (the blue Johnny Campbell Signature ones) which still elude me unfortunately, the wheels need respoking, the steering damper and various smaller things like digital speedo (for roadworthy), handlebars, footpegs, chain and sprocket, tyres etc.

So my personal deadline on the build is now set at March/April 2014.  In some way, shape or form I will have between 90-100% of the bike complete by then so that it is back to being ridable rather than a museum piece which it currently is.  Watch this space for any updates and thank you all for sticking with the build, and as always if you need any help or advice or even information that I have left out, please get in touch!

Monday, 15 July 2013

XR650R Baja 1x Dream Bike Build (The Frame)

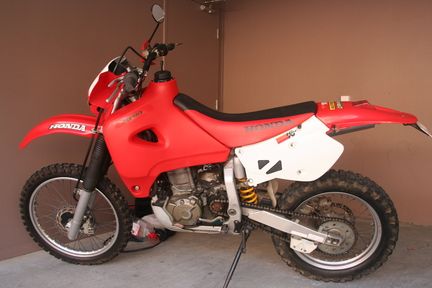
My 2000 XR650R (Aussie spec, road legal with uprated stator and all the electrics) was not the most ideal base for this build. There were many signs of its age showing, and as new shiny parts started to arrive I knew I had to make the old things look new again!


The first thing to tackle was the frame. I took it to a local bike paint shop and came out feeling let down. The guy I spoke to was friendly but he didn't look positively on getting my frame sanded and painted/powder-coated. His exact words were: "it'll take a lot of hours", "won't be cheap" and "I have never done a dirt bike frame before, the oil tank is a problem".


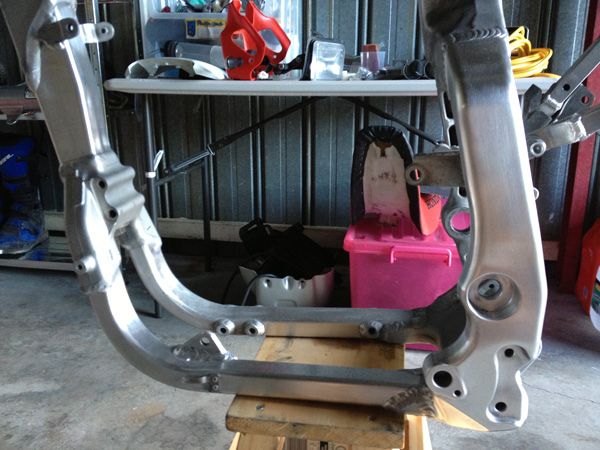
With pressure building on getting the build done right, I thought I would find a better solution and do it myself. I looked at what is actually on show once the bike is fully built, and also what on my frame was looking tired. Years of leaking coolant had pitted the lower cradle and the side uprights were scuffed (the tubular parts of the frame, I polished the cast bits but left them as they were)


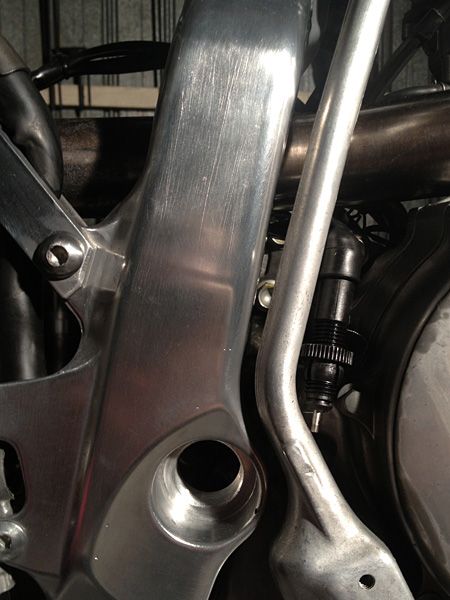
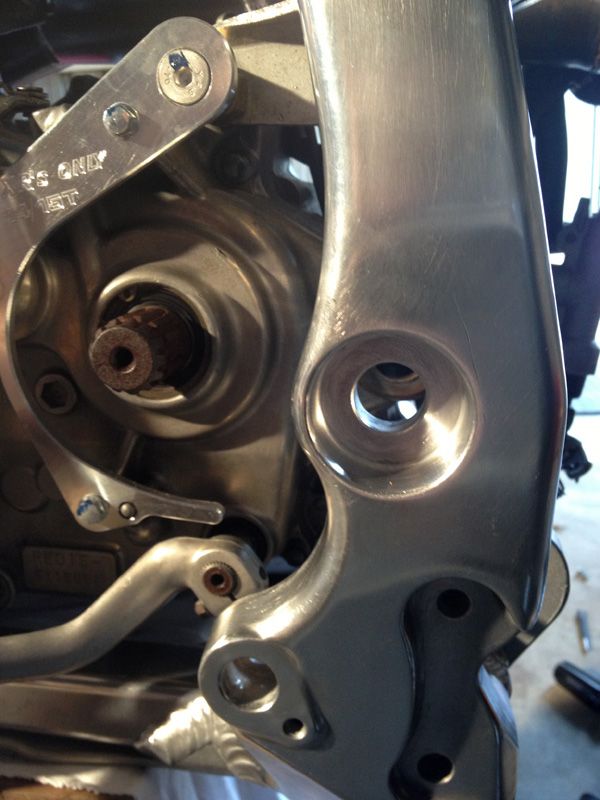
I decided to sand these areas by hand, using first a 240 paper and then a 400 to finish. It took several hours and also an electric drill with wire brush bit to get at all the corners and provide an even finish. I had to sand lightly to finish, and only in one direction to create a nice 'brushed' aluminium look. End result is it looks great! It will be open to the elements and I don't expect it to stay this nice, but I can always maintain it my lightly sanding it again.


Using a top quality aluminium polish also adds a layer to protect the exposed aluminium from the elements.

**For any purists reading this: I discovered that the 1x bike also had 'brushed' aluminium on the uprights, so this method is in line with the real thing ** :)

Sunday, 3 February 2013

XR650R Baja 1x Dream Bike Build (Update 1)

XR650R Baja 1x Dream Bike Build (update 1)
10/01/2013

So two months on and it's 2013. I have slowly been getting the bike stripped and ready for the piece by piece rebuild. My unit resembles an XR650R graveyard with bike pieces scattered across two balconies and various cupboards in our kitchen! What I would give to have a shed...


As you can see by these photos the build looks far from complete. Like any bike tear down though, there are always more things that end up needing to be bought before reassembly than first thought. Whilst it is stripped I have decided to go through everything from bearings to hoses and bolts to work out where there is fatigue or corrosion, this will hopefully ensure that by replacing them I won't need to tear anything down for a while.

As mentioned before the engine is how I want it so nothing will be changing there for this build. In fact with the hot cams stage 1 and the air box mods along with the Vortex ignition this engine is more than enough for a race bike replica.

The parts so far that I have sourced have mostly been superficial but crucial nonetheless. As in the picture below I have had fun trying to find quality decals like the originals.


And then just a few other bits and pieces like clutch perch accessories and stainless bolts for some of the frame and plastic bolts.

I got my hands on the CR500 rear shock which will act as a donor along with the stock XR shock to build the hybrid shock like the Baja bike had. The main advantages with this shock was that the CR500 shock had a high speed clicker adjustment and it was also designed for stiffer use. The biggest attraction for me is that it also raises the height of the rear a little. I will be sending this to Suspension Matters for gold valves and the spring selection as well as for building the shock from the two donors. In an ideal World I would send them to Precision Concepts in the US to build exact replicas, but that would be an extremely expensive exercise and one I simply can't afford. I will however keep my eyes peeled as some people have told me that they occasionally come up for sale in the US on the used market, so I could always fit one later.

So the next big development is the Pro Circuit race pipe. I got the muffler on Ebay dead cheap from someone in Australia who wanted to go back to stock, but as he didn't know the history if these pipes he kept the headers to polish up and use with his stock muffler. It was like a crime to the informed, but hey that's life, and he didn't want to sell the headers no matter what I told him! The chances of just the headers coming up for sale are minuscule so I had to come up with a compromise. I had heard that XR's Only made a hand-made pipe that was based on the same principles as the PC pipe, with similar headers. Some came up for sale on Ebay in the US so I jumped on them. The result - they fit so well and look so similar that maybe even Johnny Campbell would know they were not the PC headers! Nice result (pictured below) and once again I will keep looking for the original ones still.

The rest has been mostly cleaning and polishing of every little piece of the bike to look for damage and also to neaten the bike up generally. I am becoming somewhat obsessed about finding the bits and I have received some awesome info from forum members and people like JCR, Precision Concepts, Team Honda, Works Connection and Pro Circuit who all seem interested in the build and have done their bit to help with tracking down parts etc.

The most illusive part is still the rear brake, as they were built in small numbers by Nissin to fit to Jean-Michel Bayles CR500 back in the days, and only three were used on the XR for team Honda. From my understanding two are still in known existence and both are unlikely to come up for sale. Unless I can find one on a CR500, I will have to fashion up something or just stay with stock....grrrrrr.

The next bits on the parts list are the suspension mods and then getting the tired 2000 model frame powder-coated so that I can begin the rebuild onto the main frame and acquire parts as I go.

Watch this space, it may be the Worlds slowest build but it sure will be a beast once it is done! If I am not expert on the 2005 Baja bike by the end of this I will be very surprised!

Happy New Year!

Saturday, 10 November 2012

XR650R Baja 1x Dream Bike Build (Intro)

XR650R Baja 1x Dream Bike Build
(Intro)

No race has more links to the XR650R than the Score Baja series in Mexico.  Every year hundreds of crazy desert racers hit the dust to experience all that is the Baja.  'Dust to Glory' is a documentary which gives the viewer an insight into the hardcore desert racing fraternity, and also the legend that is Johnny Campbell.  Johnny raced the XR650R in the early part of the naughties until Honda pulled it from their range to introduce the CRF450X.

Johnny's XR was built by Bob Bell and his crew at Precision Concepts and was not too far removed from the stock bike (to the naked eye).  In reality they made some key mods to the engine, suspension, intake, braking and exhaust.  The stock bike makes around 43hp to the rear wheel, whilst the 1x (the number of the Honda A team bike) bike made a whopping 67hp.  The setup was specific to the wide-open riding of the Baja race.
I am not going to go into too much detail as there is plenty on Precision Concepts website that explains the mods, but basically the 1x bike was the ultimate XR650R.  It was lean and focused, and also amazingly good looking!


My dream would be to afford to buy an original bike from the race team or from someone who already has, but that is unlikely to happen any time soon.  Even if I had the cash, where do you look for one?  Living in Australia doesn't help either.  There will be a lucky few in the USA who got their hands on the actual thing, and I will forever be envious of them.  If I were them I would also hang onto the bike for dear life!  One down side though is they are essentially museum pieces now, and riding them would be a crime in my opinion.  Where is the fun in having a race bike sat in the garage?!

So you may be wondering what I am getting at, but I want to build a Replica 1x Baja XR650R.

Replica's are hard to build when replicating a 'works' bike as most of the components are a one-off for the race, and the 1x bike is no different.  I am going to be realistic about this build and will have to make do with some closely matched components, as well as a few legal bits to make the thing ridable here in Australia (ie. lights, chain guard, indicators, speedo etc.).

The parts list is long and expensive, but the idea is to create as close to original as possible and in turn creating a simply unique XR for Australia and most of the World.  Modifying bikes/cars never makes you money, so I don't expect to increase the bikes value much but that's not the ultimate idea here.  This build will be done over as long as a year or two as I gather the parts which are harder to find, but keep an eye on my blog and I will keep you up-to-date with my findings and progress!

Long live the King of Baja!!

Saturday, 13 October 2012

Front Brake Clean and Bleeding

When buying a new bike it is always a good idea to strip down all the crucial bits to ensure there is nothing that needs attention and also to familiarise yourself with your new bike if you have never worked on that model before.

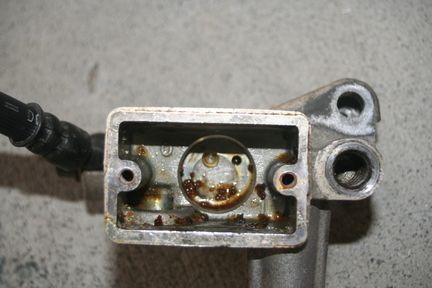
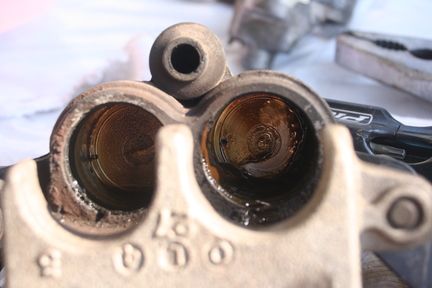
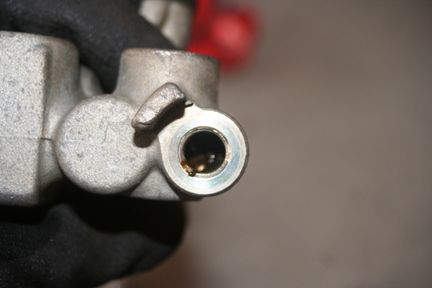
Because this bike is my daily commute, from day one I have had to do this on the go, allowing only weekend time.  This can be tough as the bike needs to be in one piece for Monday morning.  However, I am slowly doing one thing at a time and the latest is giving the brakes a service.  I suspected that my brakes had not been serviced for a long time, if not since new (year 2000!), and as you will see below, I probably had a case for that suspicion, they were full of gunk!!

My task was to remove, clean and replace the front brake system, including fitting a loaned braided brake hose from my friend Geordie.  With the added weight of the Acerbis tank I feel the brake could be beefed up a little and Geordie has had lots of experience with the XR brakes, and just about everything on the XR to be honest, and his verdict on all the available mods (including larger front rotor) was that a good service and a braided hose has the largest improvements.  A larger rotor is a good mod but more for very heavy weight addition or road use.

There are many opinions on this but it really comes down to the type of riding you do on your XR.

Special things needed:

  • container
  • rags
  • clear hose
  • one way valve (optional)
  • syringe that fits tightly onto clear hose


Step 1:

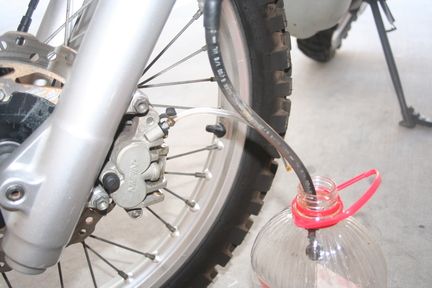
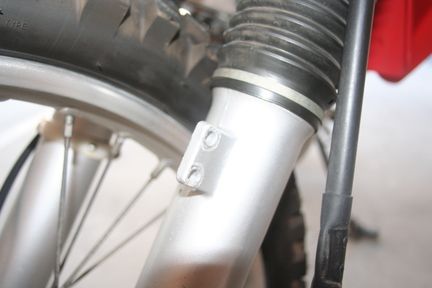
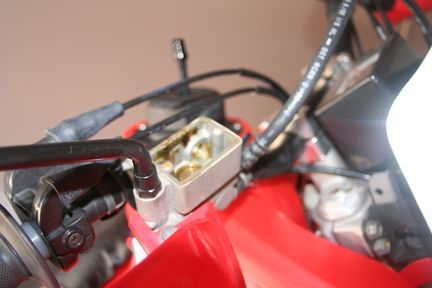
Get a container to catch the old fluid and place it under the calliper.  then place a short hose on the bleed nipple and tweak it a quarter turn until fluid comes out, then proceed to pump the brake lever until it stops.  Next remove the hose clamp half way up the fork to release the hose.  Next remove the calliper hose banjo bolt and place that in the container and pump the lever again.  Then you can remove the top banjo where it meets the master cylinder and carefully remove the hose, watching out for more drips from the lower edge.


Note: brake fluid is horrible stuff and can wreck plastics and rubbers etc. so have plenty of rags and/or paper protecting your tank area and floor and brake pads.  Contaminated brake pads are as good as useless.

Step 2:

Carefully remove the calliper from its mountings by undoing the two size 12 bolts, at the same time you can remove the brake pad pin with a flat head screwdriver and remove the brake pads and place in a safe place (or replace if required).  Remaining fluid will continue to come out so transport in a rag to avoid spillages.  Remove the master cylinder from the handlebars and pour remaining fluid into container.


Step 3:

Now you can start removing everything that can be removed from the calliper and master cylinder being careful not to damage any seals, pistons etc.  The pistons can be removed by using nylon lined pliers to grip the edge and by twisting and pulling they will eventually come out.  The master cylinder has a small plastic 'bubble' in it that needs to be removed and cleaned with an aerosol/compressed air as any gunk will most likely be collect in or below this.  On Geordies advice I used an acid cleaner to soak and then scrub the major calliper components and the master cylinder.  All corners and passages where fluid travels need cleaning until all residue is removed and all parts are clinically clean.


Note: If you suspect your brakes need a full service with master cylinder plunger and pistons and seals needing replacing, this would be a good time to fit them.  On this occasion I knew I would have the brakes apart again in a few weeks so will be ordering the service kit before I do.


Step 4:

Reassemble the calliper and master cylinder in the same way you took it apart, leaving the pistons in roughly the right position to allow space to fit the pads and slide back over the rotor.  Bolt everything back to the bike excluding the two banjo bolts, but route the hose.  The next step is bleeding, and there are various ways this can be done.  The XR is a particularly difficult to remove all air from the system so I will describe the method which worked for me, but note there may be better/easier ways depending on the equipment you have.

Step 5:

Tighten the lower banjo bolt on the hose with new copper washers, then fit a clear hose to the bleed nipple and loosen it a quarter or so turn until it is open.  Using a syringe full of new Dot 4 fluid, pump fluid into the other end of the clear hose whilst simultaneously holding the upper end of the new hose with a rag, watching for the first signs of fresh fluid coming out the top.  Once it does, still holding pressure on the syringe, tighten the bleed nipple again.  Then carefully connect the upper end of the hose to the master cylinder with new copper washers.

Step 6:

Now fill the master cylinder about half way and give it a few pumps by hand.  If bubbles start to surface from the bottom of the reservoir, continue to pump until these disappear.  Chances are though that you will never get all the air out like this so do the following:

Fill the master cylinder and place the seal and cover back on.  Now unbolt it from the handlebars again (yes I know it sounds crazy!) and hold it in the air as high as the hose permits.  Then starting on the calliper, tap it firmly with something like a screwdriver handle and move your way up the hose as if forcing air up, then tap the master cylinder whilst still holding it up high.  you can then pump the lever or push the plunger by hand a few times and do this a few times over.

Now you can bolt the cylinder back onto the handlebars, unscrew the cover and remove the seal.  you should notice loads of small air bubbles or one large bubble in the plastic 'bubble' described earlier.  continue to pump the lever until these surface and disappear.  This will most likely take some time and patience really is needed.  As long as you continue to get bubbles you know it is still work in progress!  If you have to elevate the cylinder again then so be it.

Eventually the lever will become firm and then you need to make sure no more air is coming up the hose into the cylinder.  At this point your brakes are bled and you can replace the seal and cover.  Give everything a once over and make sure everything is tight and has been reinstalled.

Now you are ready to test it!  If you have any questions regarding this task or anything else XR650R related please email me at travis.cul@gmail.com