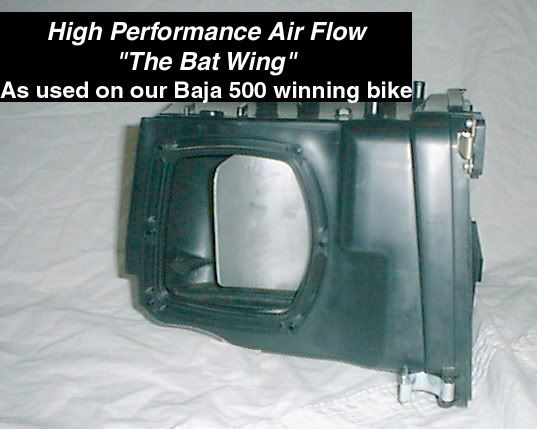
The 'Batwing'
"Jonah Street came up with that. I wish that we would have saved one as a template, but we didn't. Diane"
So, I began my search for the best approach. Put simply the Bat Wing was a piece of aluminium fixed inside the air box to smooth out the airflow into the throat of the carb. Bob and his team quickly noticed from the first prototype race bike that the XR650R air box is one of the worst designs for a race air intake. The aim of an air box is to filter and provide enough air to feed the fuel ratio at any RPM, and in a racing bikes case that needs to be at its optimum at high RPM, when the bike needs the most air at once.
Something had to be done and Jonah Street along with some aerospace input came up with one or both of the following designs (since posting this I was made aware by Mung that the second design is an original so I will find out more before confirming one or the other) to smooth the airflow:
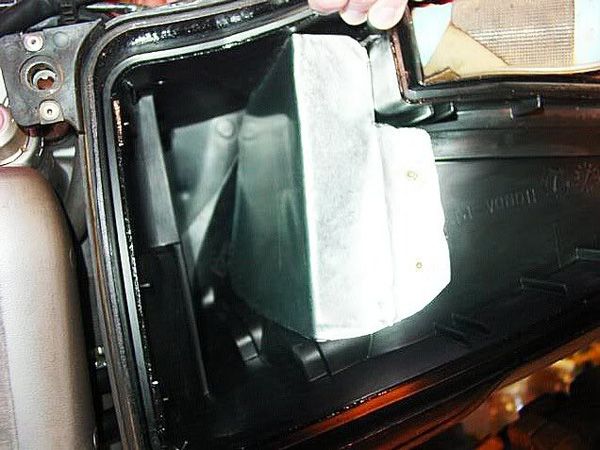
This first design looks easier than it may seem to make. You have to bend and twist the aluminium in several directions and it is important that you seal it around the edges to prevent air getting past. The throat bend is quite short too. This design is unlike any other attempts I have seen. The second is simpler to make as it just bolts top and bottom and sits in the middle of the air box.
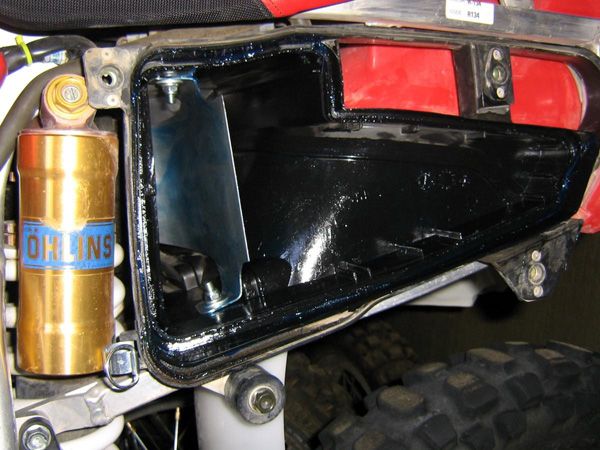
Here is an attempt made by another owner:
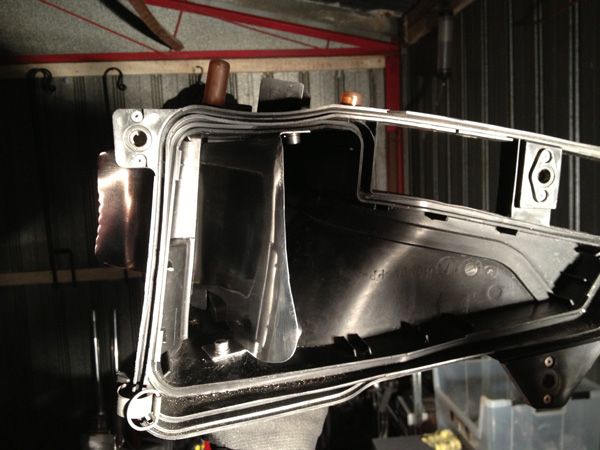
I had already begun to make my own Bat Wing when I found the original photos of the Baja bike's Bat Wing so I contacted fellow inmate Burpsa about his attempt and he kindly gave me a pdf template of his design plus some info on where he felt it could improve. One area being the throat which I then looked at making longer so that it goes right up towards the carb.
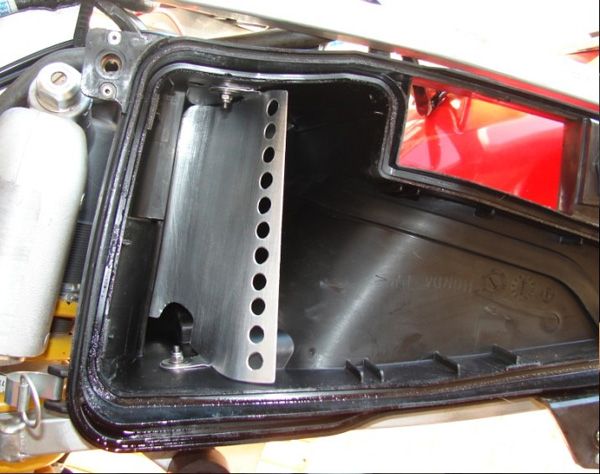
Here is my attempt in pictures:
First I made a template out of 0.6mm aluminium as it is easier to cut and shape
 |
| Initial template with shorter throat |
Note the much longer throat, the challenge was going to be how to keep it from flapping
 |
| Rough template cut |
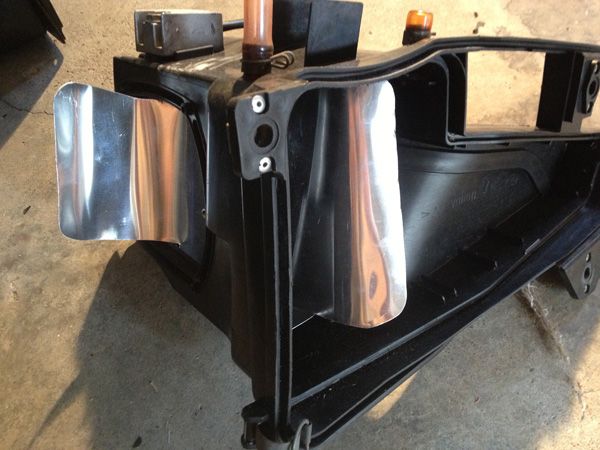
I then made a few tweaks here and there to get it fitting right and then cut the 1mm aluminium into shape, and this is what it looks like
 |
| Initial fitment before smoothing edges |
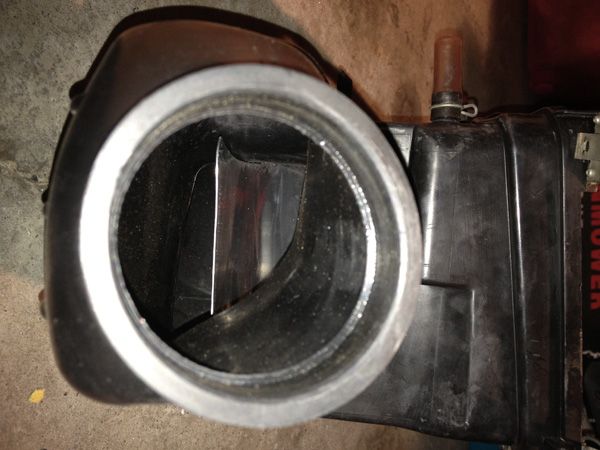 |
| Throat view |
 |
| Side/inlet view |
I also polished the aluminium surface to make it super smooth. The theory with this design is that it channels most of the air to the left of the Bat Wing and doesn't reduce the volume of the air box for lower RPM use. Coupled with the HRC spec air box cutout it should be effective at getting most of the air to the intake as smoothly and directly as possible.
As the bike is still being built I have not been able to test it, but with my aerospace experience in the air force and a bit of practical theory, I can see it doing a pretty good job. One of the myths has been a 'massive power gain' but this is optimistic in my opinion. For most normal trail riders this Bat Wing may not be too noticeable. I suspect that with the correct exhaust system (T4 Megaphone type) it aids overall air flow and therefore helps the engine cycle by making air more easily available at a certain RPM.
The throat feels solid so hopefully it won't flap once air starts passing over it. I will be making the 'original' design too and then try both side-by-side and decide on the best for my bike.
Any questions/ideas please fire away

Airbox mod
The other aspect of the air box modifications is the very popular side cover cut out. I could have bought the XR's Only version side cover which already has their own vent kit already fitted, but I fancied using a OEM side cover but theirs use the UFO replica which is not quite the same as OEM.
The kit comes with instruction but it is basically a matter of cutting the vents to fit the mesh they provide and then drill each rivet in so that the mesh is mounted to the inside of the cut outs. I used a Dremel as it is very precise and has a good attachment for providing a very clean finish with no fraying.
The only difficulty I had was firstly positioning the cut outs either side of a fin on the inside which keeps the air filter in place. I used an LED pencil torch in a dark room to Prestik the mesh frames into place and then shining the light through the plastic so I could mark where to cut on the outside. (I have to admit that my wife came up with the torch idea, and it worked brilliantly!)
 | ||||||
Finishing off the cut out with a Dremel
|


Can you send me the PDF of the template?
ReplyDelete