Because this bike is my daily commute, from day one I have had to do this on the go, allowing only weekend time. This can be tough as the bike needs to be in one piece for Monday morning. However, I am slowly doing one thing at a time and the latest is giving the brakes a service. I suspected that my brakes had not been serviced for a long time, if not since new (year 2000!), and as you will see below, I probably had a case for that suspicion, they were full of gunk!!
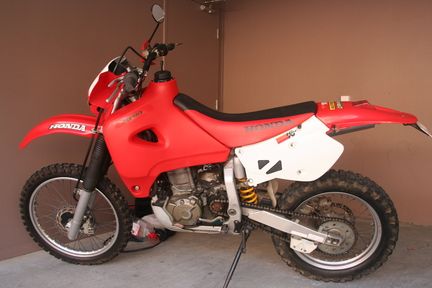
My task was to remove, clean and replace the front brake system, including fitting a loaned braided brake hose from my friend Geordie. With the added weight of the Acerbis tank I feel the brake could be beefed up a little and Geordie has had lots of experience with the XR brakes, and just about everything on the XR to be honest, and his verdict on all the available mods (including larger front rotor) was that a good service and a braided hose has the largest improvements. A larger rotor is a good mod but more for very heavy weight addition or road use.
There are many opinions on this but it really comes down to the type of riding you do on your XR.
Special things needed:
- container
- rags
- clear hose
- one way valve (optional)
- syringe that fits tightly onto clear hose
Step 1:
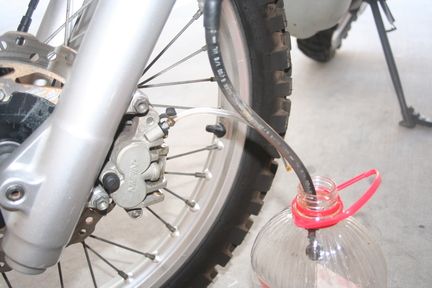
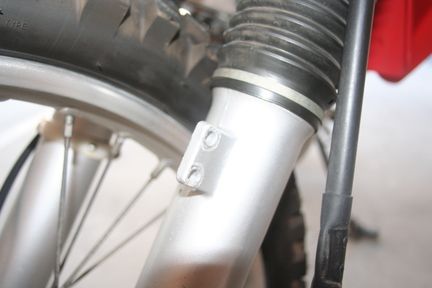 Get a container to catch the old fluid and place it under the calliper. then place a short hose on the bleed nipple and tweak it a quarter turn until fluid comes out, then proceed to pump the brake lever until it stops. Next remove the hose clamp half way up the fork to release the hose. Next remove the calliper hose banjo bolt and place that in the container and pump the lever again. Then you can remove the top banjo where it meets the master cylinder and carefully remove the hose, watching out for more drips from the lower edge.
Note: brake fluid is horrible stuff and can wreck plastics and rubbers etc. so have plenty of rags and/or paper protecting your tank area and floor and brake pads. Contaminated brake pads are as good as useless.
Step 2:
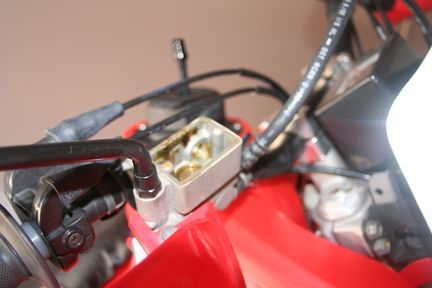 Carefully remove the calliper from its mountings by undoing the two size 12 bolts, at the same time you can remove the brake pad pin with a flat head screwdriver and remove the brake pads and place in a safe place (or replace if required). Remaining fluid will continue to come out so transport in a rag to avoid spillages. Remove the master cylinder from the handlebars and pour remaining fluid into container.
 Step 3:
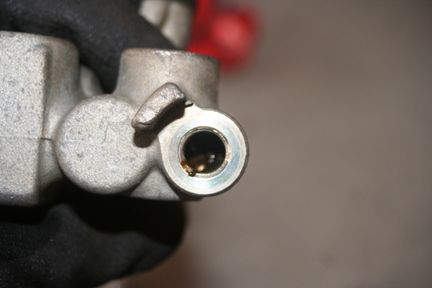
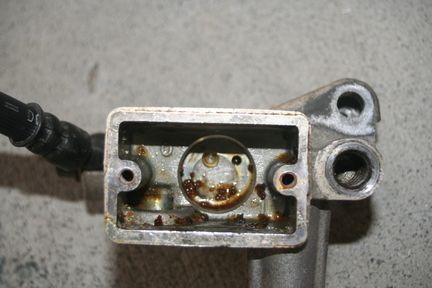 Now you can start removing everything that can be removed from the calliper and master cylinder being careful not to damage any seals, pistons etc. The pistons can be removed by using nylon lined pliers to grip the edge and by twisting and pulling they will eventually come out. The master cylinder has a small plastic 'bubble' in it that needs to be removed and cleaned with an aerosol/compressed air as any gunk will most likely be collect in or below this. On Geordies advice I used an acid cleaner to soak and then scrub the major calliper components and the master cylinder. All corners and passages where fluid travels need cleaning until all residue is removed and all parts are clinically clean.
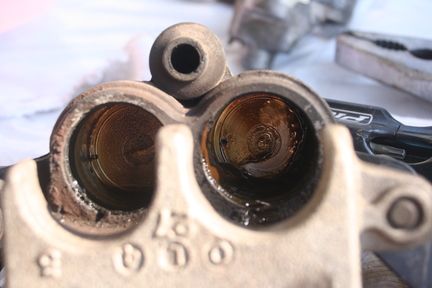
Note: If you suspect your brakes need a full service with master cylinder plunger and pistons and seals needing replacing, this would be a good time to fit them. On this occasion I knew I would have the brakes apart again in a few weeks so will be ordering the service kit before I do.
Step 4:
Reassemble the calliper and master cylinder in the same way you took it apart, leaving the pistons in roughly the right position to allow space to fit the pads and slide back over the rotor. Bolt everything back to the bike excluding the two banjo bolts, but route the hose. The next step is bleeding, and there are various ways this can be done. The XR is a particularly difficult to remove all air from the system so I will describe the method which worked for me, but note there may be better/easier ways depending on the equipment you have.
Step 5:
Tighten the lower banjo bolt on the hose with new copper washers, then fit a clear hose to the bleed nipple and loosen it a quarter or so turn until it is open. Using a syringe full of new Dot 4 fluid, pump fluid into the other end of the clear hose whilst simultaneously holding the upper end of the new hose with a rag, watching for the first signs of fresh fluid coming out the top. Once it does, still holding pressure on the syringe, tighten the bleed nipple again. Then carefully connect the upper end of the hose to the master cylinder with new copper washers.
Step 6:
Now fill the master cylinder about half way and give it a few pumps by hand. If bubbles start to surface from the bottom of the reservoir, continue to pump until these disappear. Chances are though that you will never get all the air out like this so do the following:
Fill the master cylinder and place the seal and cover back on. Now unbolt it from the handlebars again (yes I know it sounds crazy!) and hold it in the air as high as the hose permits. Then starting on the calliper, tap it firmly with something like a screwdriver handle and move your way up the hose as if forcing air up, then tap the master cylinder whilst still holding it up high. you can then pump the lever or push the plunger by hand a few times and do this a few times over.
Now you can bolt the cylinder back onto the handlebars, unscrew the cover and remove the seal. you should notice loads of small air bubbles or one large bubble in the plastic 'bubble' described earlier. continue to pump the lever until these surface and disappear. This will most likely take some time and patience really is needed. As long as you continue to get bubbles you know it is still work in progress! If you have to elevate the cylinder again then so be it.
Eventually the lever will become firm and then you need to make sure no more air is coming up the hose into the cylinder. At this point your brakes are bled and you can replace the seal and cover. Give everything a once over and make sure everything is tight and has been reinstalled.
Now you are ready to test it! If you have any questions regarding this task or anything else XR650R related please email me at travis.cul@gmail.com
No comments:
Post a Comment