The ongoing debate about how much fuel is enough fuel is one which depends entirely on what type of riding you do.
My XR's primary use is to travel 60km to work and back during the week, and then travel the 100km to the 'bush' on the weekend. Once in the bush fuel is not so much an issue as one can just make sure it has the amount of gas needed, and no more.
With a L/R tank addition to a dirt bike the biggest factor becomes weight, and the extra weight of the fuel can adversely affect the handling of the bike. The front end becomes heavy and it is likely to wash more under braking. The front end dips a lot more under braking too. As the location of the fuel tank is quite high up in the COG, it can also make the bike feel a bit more top heavy which if riding mostly slow trails becomes a very tiring factor!
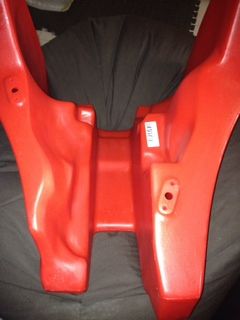
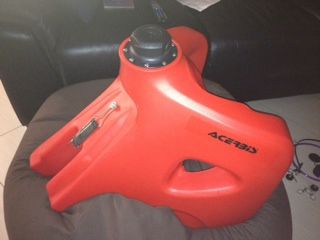
In my case I like riding mostly big wide open dirt roads at high speed, so sort of rallye type riding, which the XR was built for. These Acerbis tanks are great for this type of riding as they aid the standing position by providing a small ledge on either side for your knees to slot into (depending on how tall you are!).
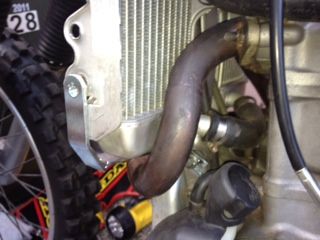
Fitment of these tanks to the XR650R can be a bit tricky especially if you have any other modifications which encroach on the space for the tank. In my case I have the Pro Circuit exhaust header which made my fitment a little tricky, and I will indicate where in my step by step installation below:
Step-by-step:
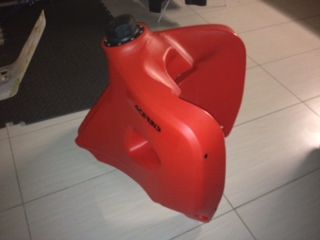
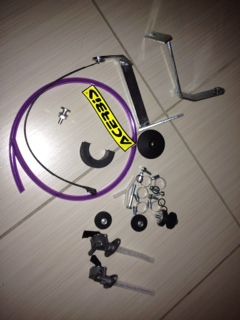
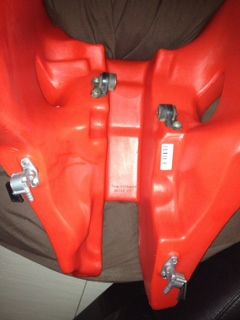
Out the packaging, the Acerbis comes with all the bits for fitment
Two brackets, fuel taps, hose, rubber frame pad, and bolts
Upside down you can see it has two fuel taps allowing fuel management out of both sides of the tank. Because it drops so low on each side and the taps sit higher than the bottom, there is always a bit of fuel left in the tank that can be utilised by turning the bike on its side when reaching empty which passes the remaining fuel to one side (you need to turn the other tap off too). If you get to this point you really should be thinking about refuelling!!
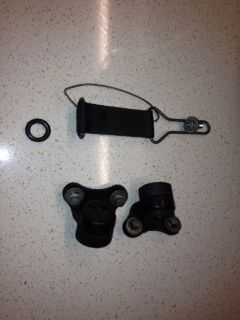
There are some parts that you need to remove from your stock tank and fit to the Acerbis, these are: rubber strap, both under side mounting bushes and in my case the fuel tap washer (I only got one for some reason)
This is how it looks once these items are fitted. I first fitted the rubber frame pad to the top of the frame underneath where the tank sits. It positions nicely just in the recess of where the ignition module is.
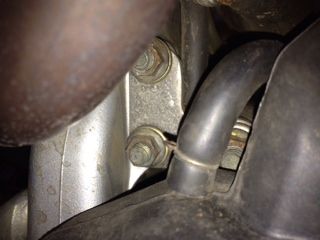
The brackets need to be fitted to either side of the top engine bolt in this photo. In my case the Pro Circuit header did not allow enough space to get any type of spanner onto either end of this bolt, so I had to remove the left side header piece before commencing. Once off it was easy to position the brackets to line up with the new tank holes. You can just keep sitting the tank in place to see where the holes need to line up with. Once the bolt is re-torqued I just made minor adjustments by using pliers to move the brackets.
Once the brackets are sorted, you can fit the tank by first lining up the underside bushings (do this first as the left side is paticularly difficult to align if the tank is fixed in place elsewhere!). Be careful not to damage the tank as getting tools to the left side is tricky as the tank design is not perfectly aligned with the bolt.

Next you can fit the strap and then align the lower mounts to the brackets with the supplied bolts and bushes. Minor adjustments can be made using a little force.
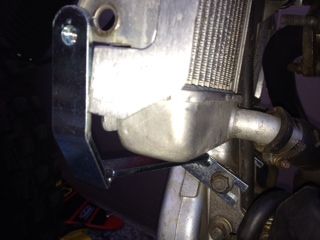
At this point you want to check that nothing is rubbing on the tank, especially in the radiator area as prolonged vibrations can eventually create a hole in your tank where harder items rub. In my case the radiator guards needed some adjustments to make them clear the inside of the tank wings. I did this by bending them slightly with a clamp. Another area you want to check is the indicators and control clearance on full turn left and right. The tank comes up much higher than the stock tank so there are most likely going to be some clearance issues. On mine the indicators bend a little on full turn, but as they are rubber mounted that will have to do for now!
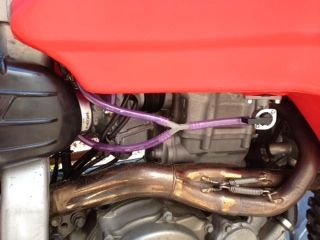
Once the tank is in place, the last thing to do is to install the fuel hose. The hose that comes with the tank is very cheap semi-translucent purple hose which I may replace sometime with a stronger type. As the tank has two fuel taps you need to cut three pieces of hose, which then connect using the supplied Y-piece. There are some supplied hose clamps but I feel that it is overkill as the hose is tight onto the connections and the clamps look a little untidy on the right hand side. I will monitor this and if it becomes obvious that I am leaking out of the joins, I will fit them at a later date.
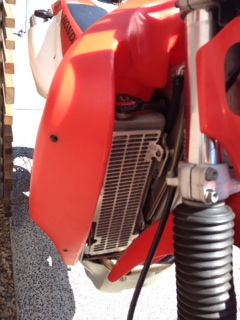
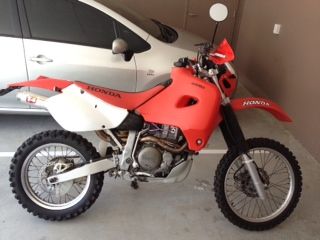
And...this is how she looks now
I also got supplied with a stock Honda seat cover which I fitted to the bike at the same time. This was just a matter of removing the staples from the black gripper cover I had before, and then re-stapling the new cover onto the existing seat base and foam. There really is nothing tricky with this job, as long as you have a staple gun that is up to the task!
This has been my second fitment of the Acerbis, first time was on a stock XR and this time on a modified XR, and it can safely be said that although some alteration had to be made this time around to make fitment possible, the Acerbis Sahara tank is a nice DIY fitment for anyone who wants to add the range to their XR for those longer trips!!
Bought for $360.00 AUD, The Acerbis Sahara L/R fuel tank is worth its price for the versatility it provides the XR650R with.
No comments:
Post a Comment